


When you have obtained your search results for a specific query, you can select a specific patent you want to view and you will come to a page that looks like this:
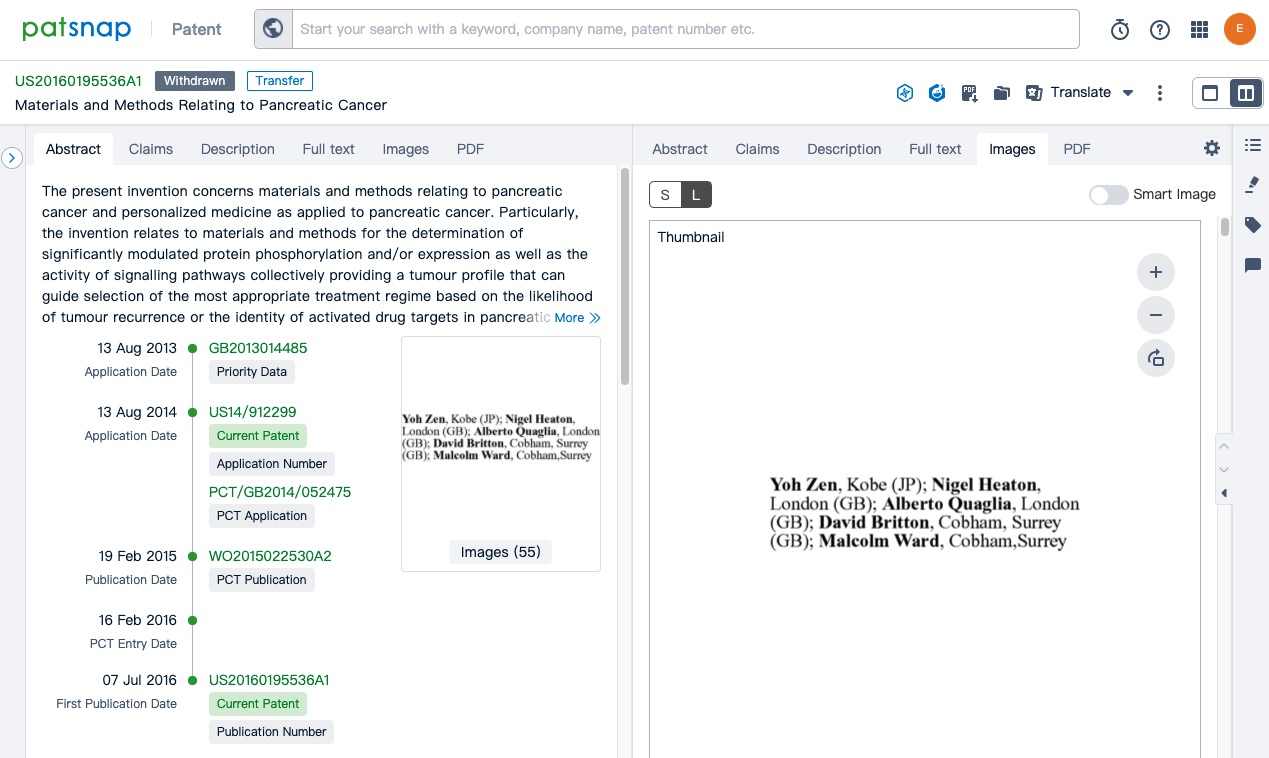
Here you will see by default, the "Abstract" option selected, which will give you various different pieces of information about the patent as well as being able to see the abstract for it.
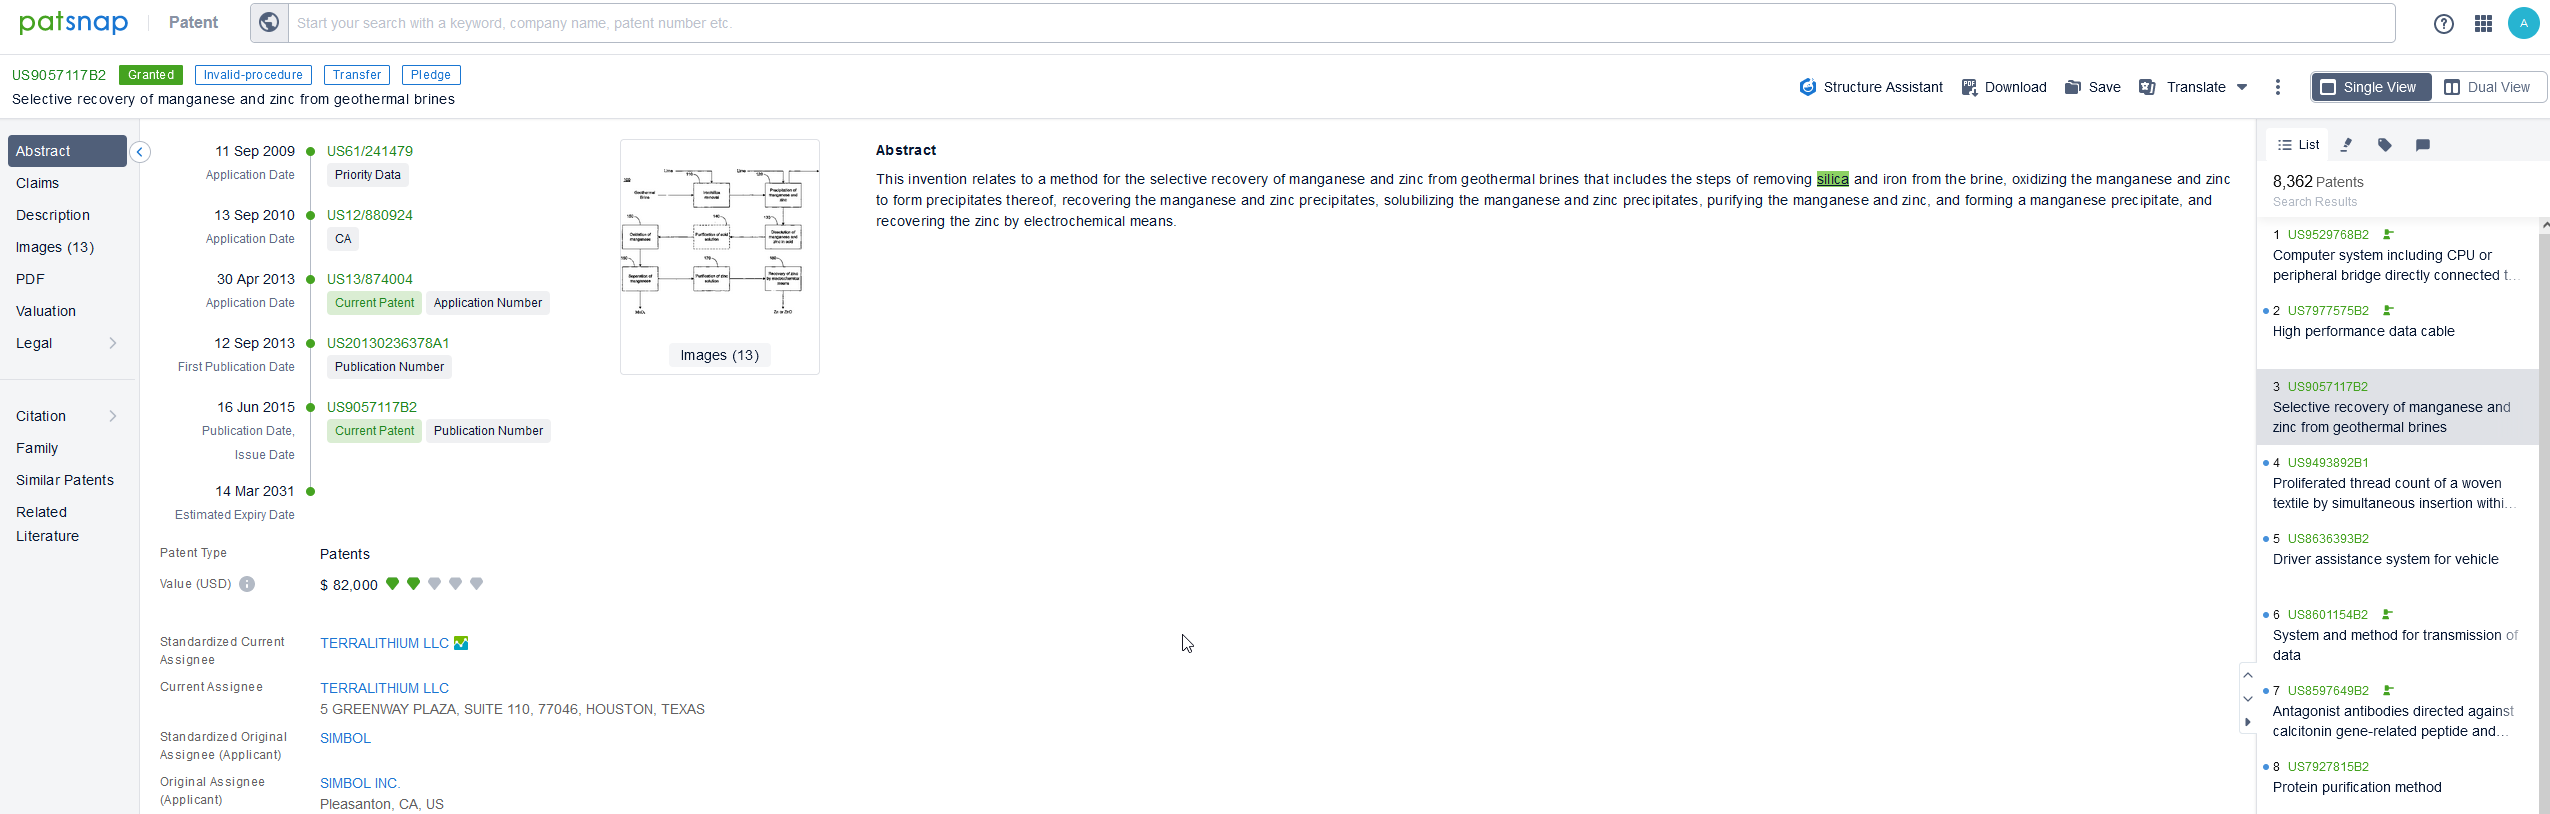
The first thing you might notice on the abstract tab is the patent timeline. The patent timeline shows you all the key dates related to an application's history in one place. It includes priority, application, publication, grant, divisional, continuation numbers and dates. For easy access to patent numbers on the timeline, you'll also find hyperlinks where available. Clicking on the hyperlinked patent number will open the result in a new tab. The patent timeline can be seen in a single or dual view. This feature is particularly helpful as it eliminates the need to gather the timeline information from different documents. Timeline information presented on a single page helps you to better understand the patent.
Additionally, you can also see an image on the right of the screen, which if selected will allow you to look at the other images contained within the patent.
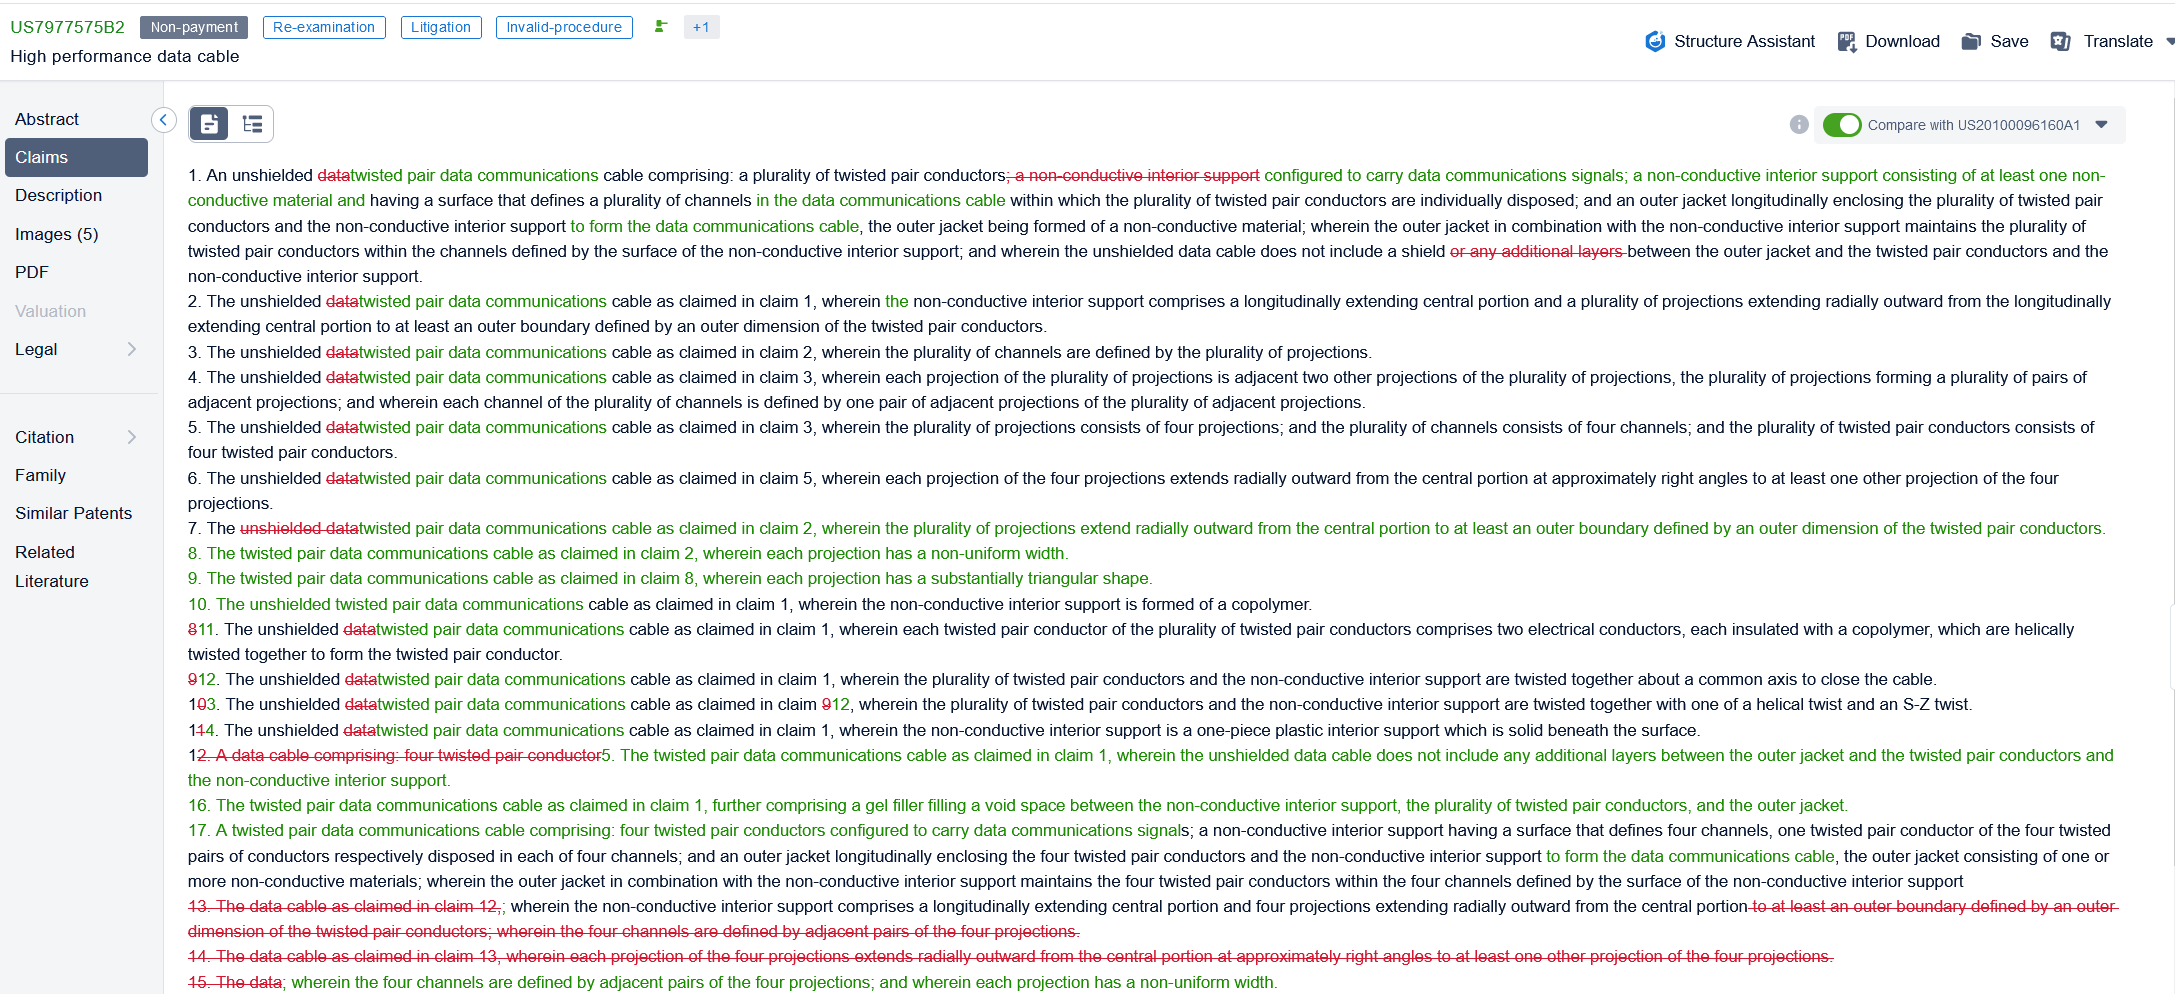
The next option is "Claims", where you are able to view the claims of the patent. You can either view these as a list (as they would originally be shown in the patent itself) or as a tree, where you can find out more about the claim tree here: What Is The Claim Tree?
Under the list view, it is possible to compare the claims of the members of the same family. You can achieve this by toggling on the switch that reads "Compare with", and then selecting one of the available records.

The changes that have occurred between the documents will be displayed in different colors. The amended/new claims will be shown in green, and the deleted claims will be colored red.
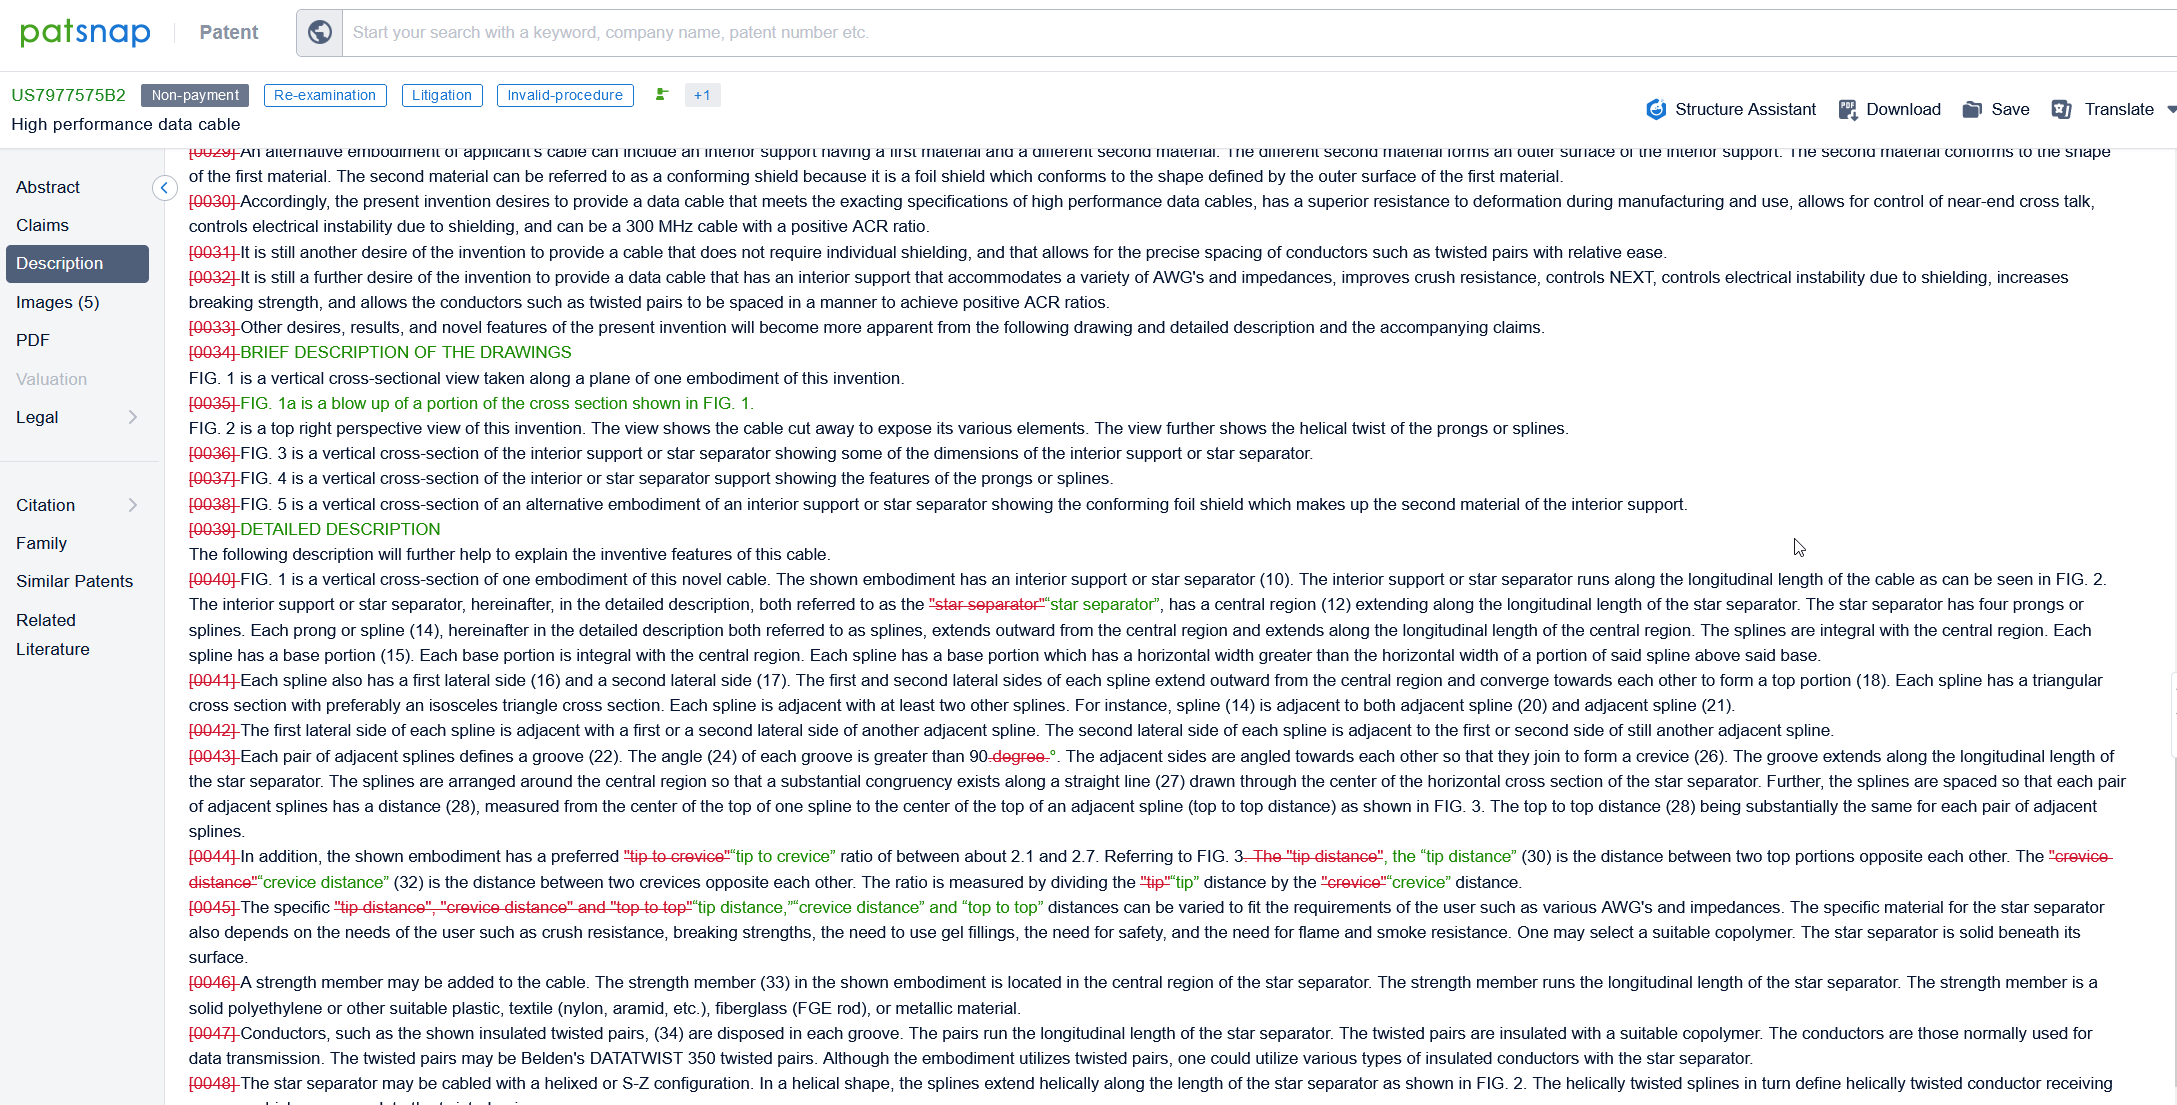
The next option is "Description", where you are able to view a broken-up description for the patent.
Under the description tab, you can compare the description of the members of the same family. You can do this by toggling on the switch that reads "Compare with", and then selecting one of the available records.
The amended/new description will be shown in green, while the deleted description will be in red.
For all the options mentioned above, you can select a section of patent text and underline text or add a comment to it while viewing a patent. Additionally, you can also perform a semantic search on a selected patent text. More information about how to underline, add a comment, and perform a semantic search from a patent text can be found here.
The next option is "Images", which is another place where you can see the images contained within the patent. You can also access "Smart Image" here, where you can find more about this in the following article: What Is Smart Image And How Do I Use It?
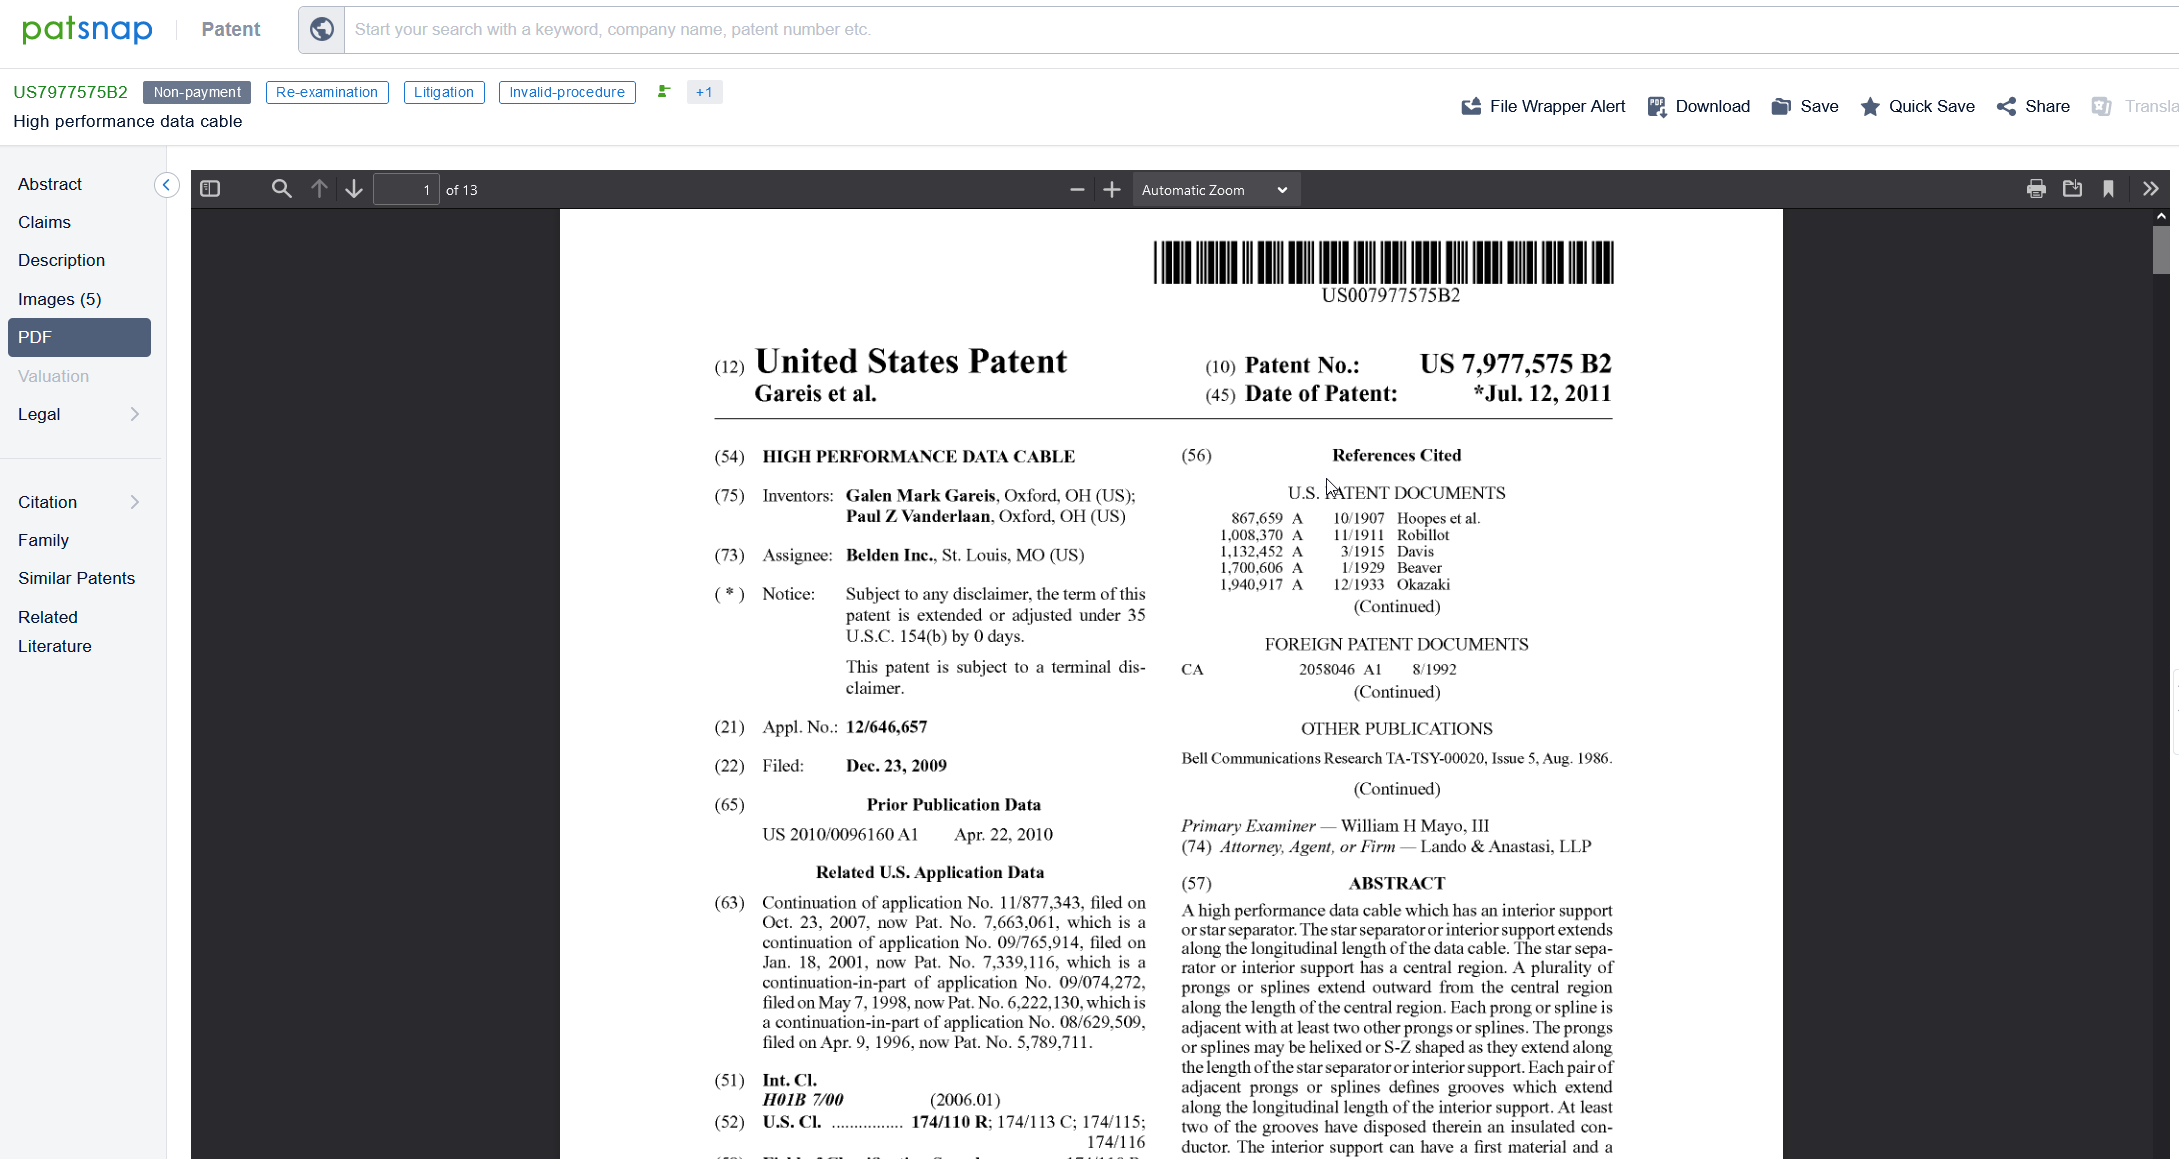
The next option is "PDF", where you can see the official PDF for the patent. Here you can zoom in/out of the PDF by clicking the options that appear on the screen once you hover over the result. You can also export or view a copy of this document on your computer.
The next option is "Patent Valuation", which gives the valuation for the patent and shows some of the different scores that are used to calculate this value. You can find more details about our valuation methodology in the following article: How Does PatSnap Valuation Work?
The next option is "Legal", where you can view legal information regarding this patent. You can find out more about this option here: What Are The Different Legal Information Options When Viewing A Patent?

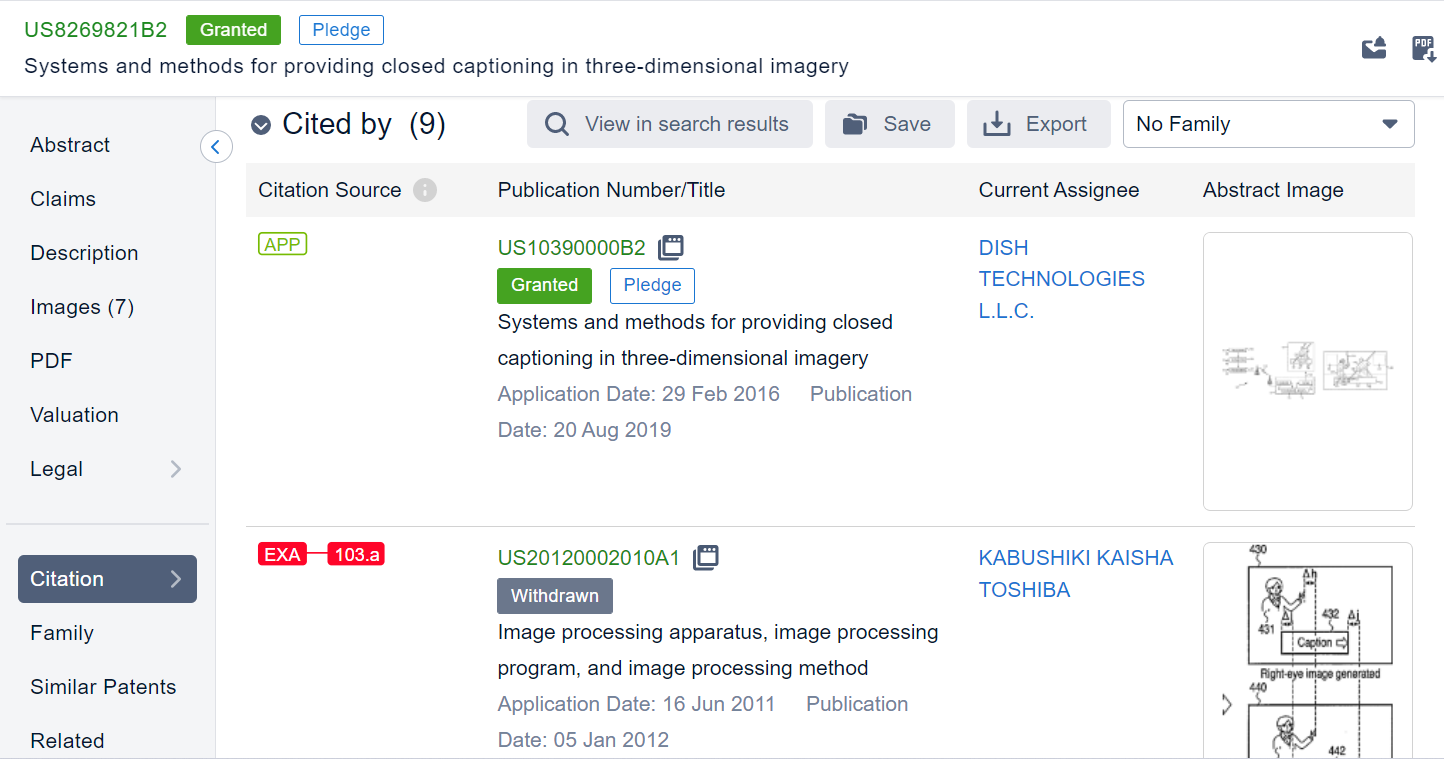
The next option you can go to is "Citation", where you can view a citation list for the patent. Here you can see both the cites within this patent and which patents cite this particular patent. From here, you can view the citations as a set of search results, save them to a Workspace, and export them. Finally, you are also able to find the "Citation Map" here, which allows you to see at a glance all of the forward and backward citations that a particular patent has. You can find more about this here: Citation Analysis.
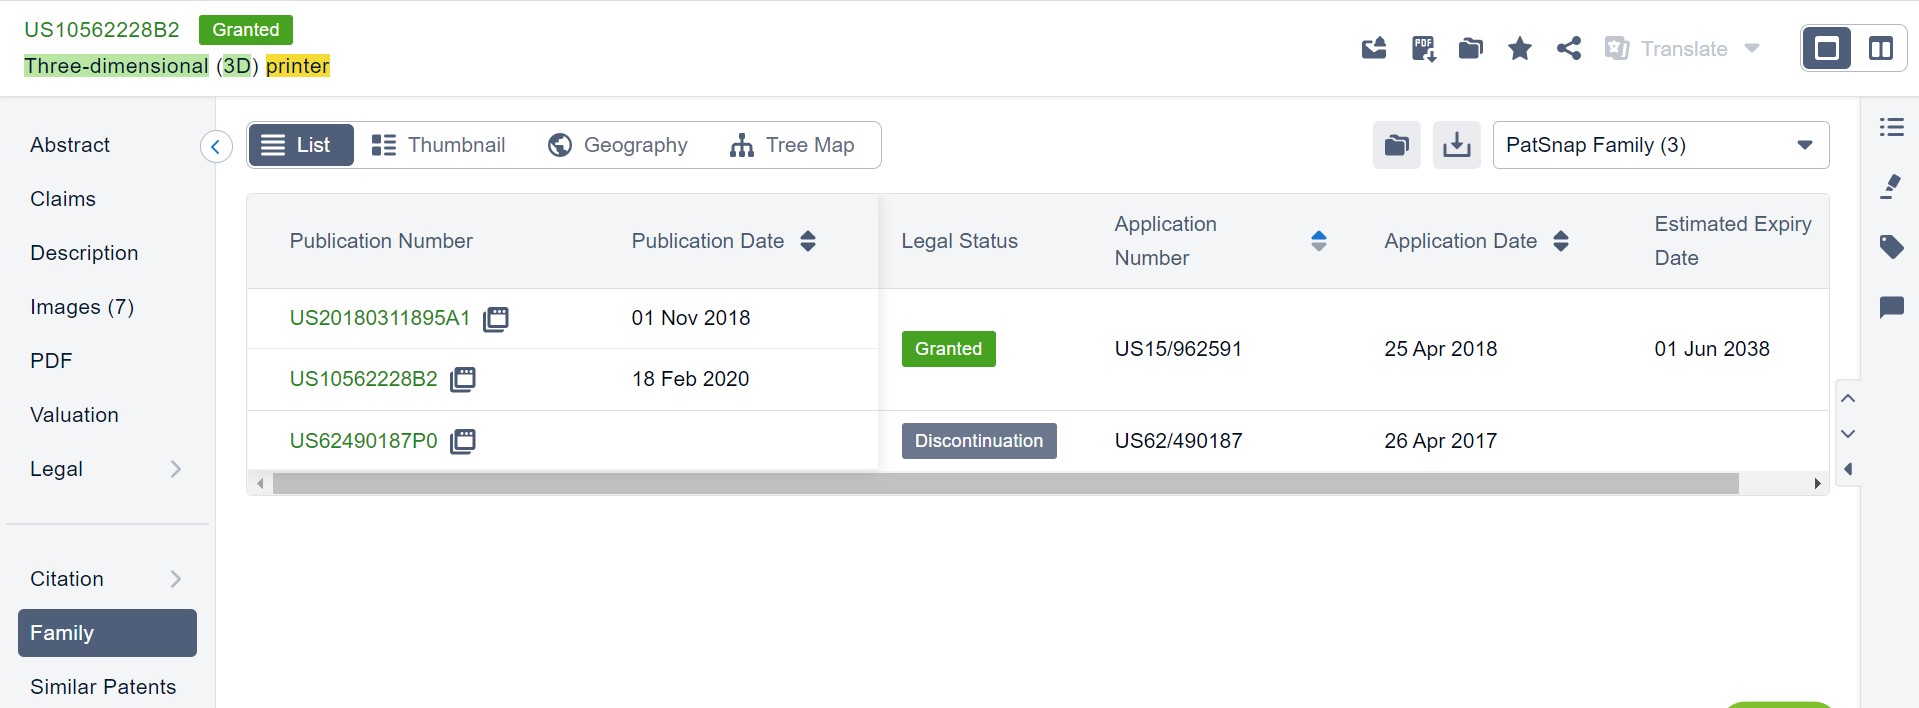
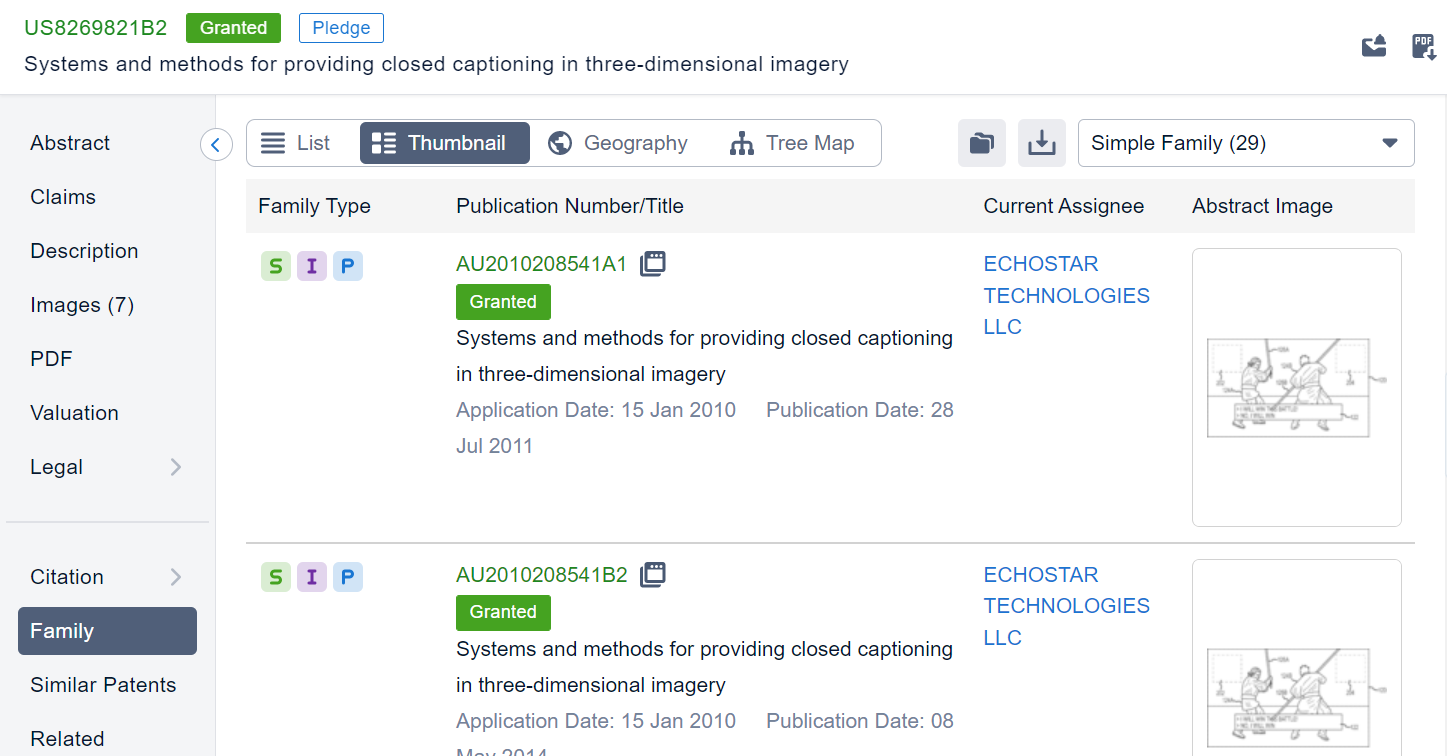
The next option is "Family", where you can view the other patents that are members of the same family as this patent (Simple/INPADOC/PatSnap) as well as view a geography and a tree map for each of these different families. You can find out more about this option here: Patent Families 101
Then there is an option for "Similar Patents", where you can see patents that are similar to the patent you are currently viewing. You can find more information about how this works here: How does the "Similar Patents" feature work?. These patents can also be added to a Workspace and exported.
And finally the last option is "Related Literature", which uses a semantic search to find related non-patent literature that is similar to the patent you are looking at. You can find out more in How Does The Related Literature Feature Work?
There are also some other options that you could use via this page.
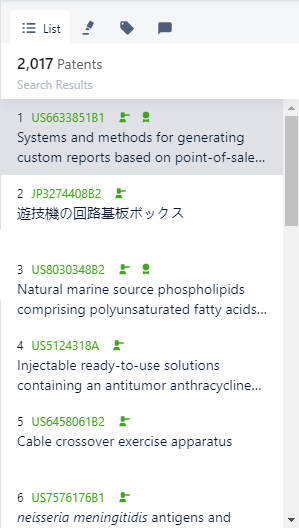
On the right-hand side of this screen, you will see a search list, which shows the patents in your search results.
You also have the highlighter option which you can use by clicking on the highlighter button found next to the list-icon:

There are two different Highlighters available; "Custom Highlighter" and "Query Highlighter".
| The Custom Highlighter lets you choose which words are highlighted with each color. You can also have more than one word selected for each color by separating them with semicolons. You are also able to turn the highlighter on/off and clear your current highlighter options: | 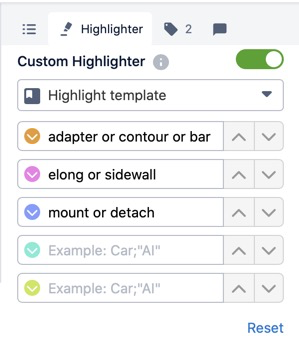 |
|
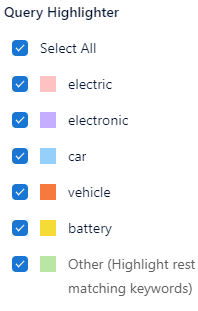
| The "Query Highlighter", as its name implies, will highlight the keywords that formed your search query where they appear in the patent. The first five keywords used in your search query will be highlighted in unique colors. Every other keyword that comes after, will be highlighted in another single color.
The highlighted query keywords can be manually selected/deselected from the "Query Highlighter" tab of the Highlighter tool menu. |
 |
For highlighting multiple keywords with a single color using the custom highlighter, separate the keywords using the OR operator.
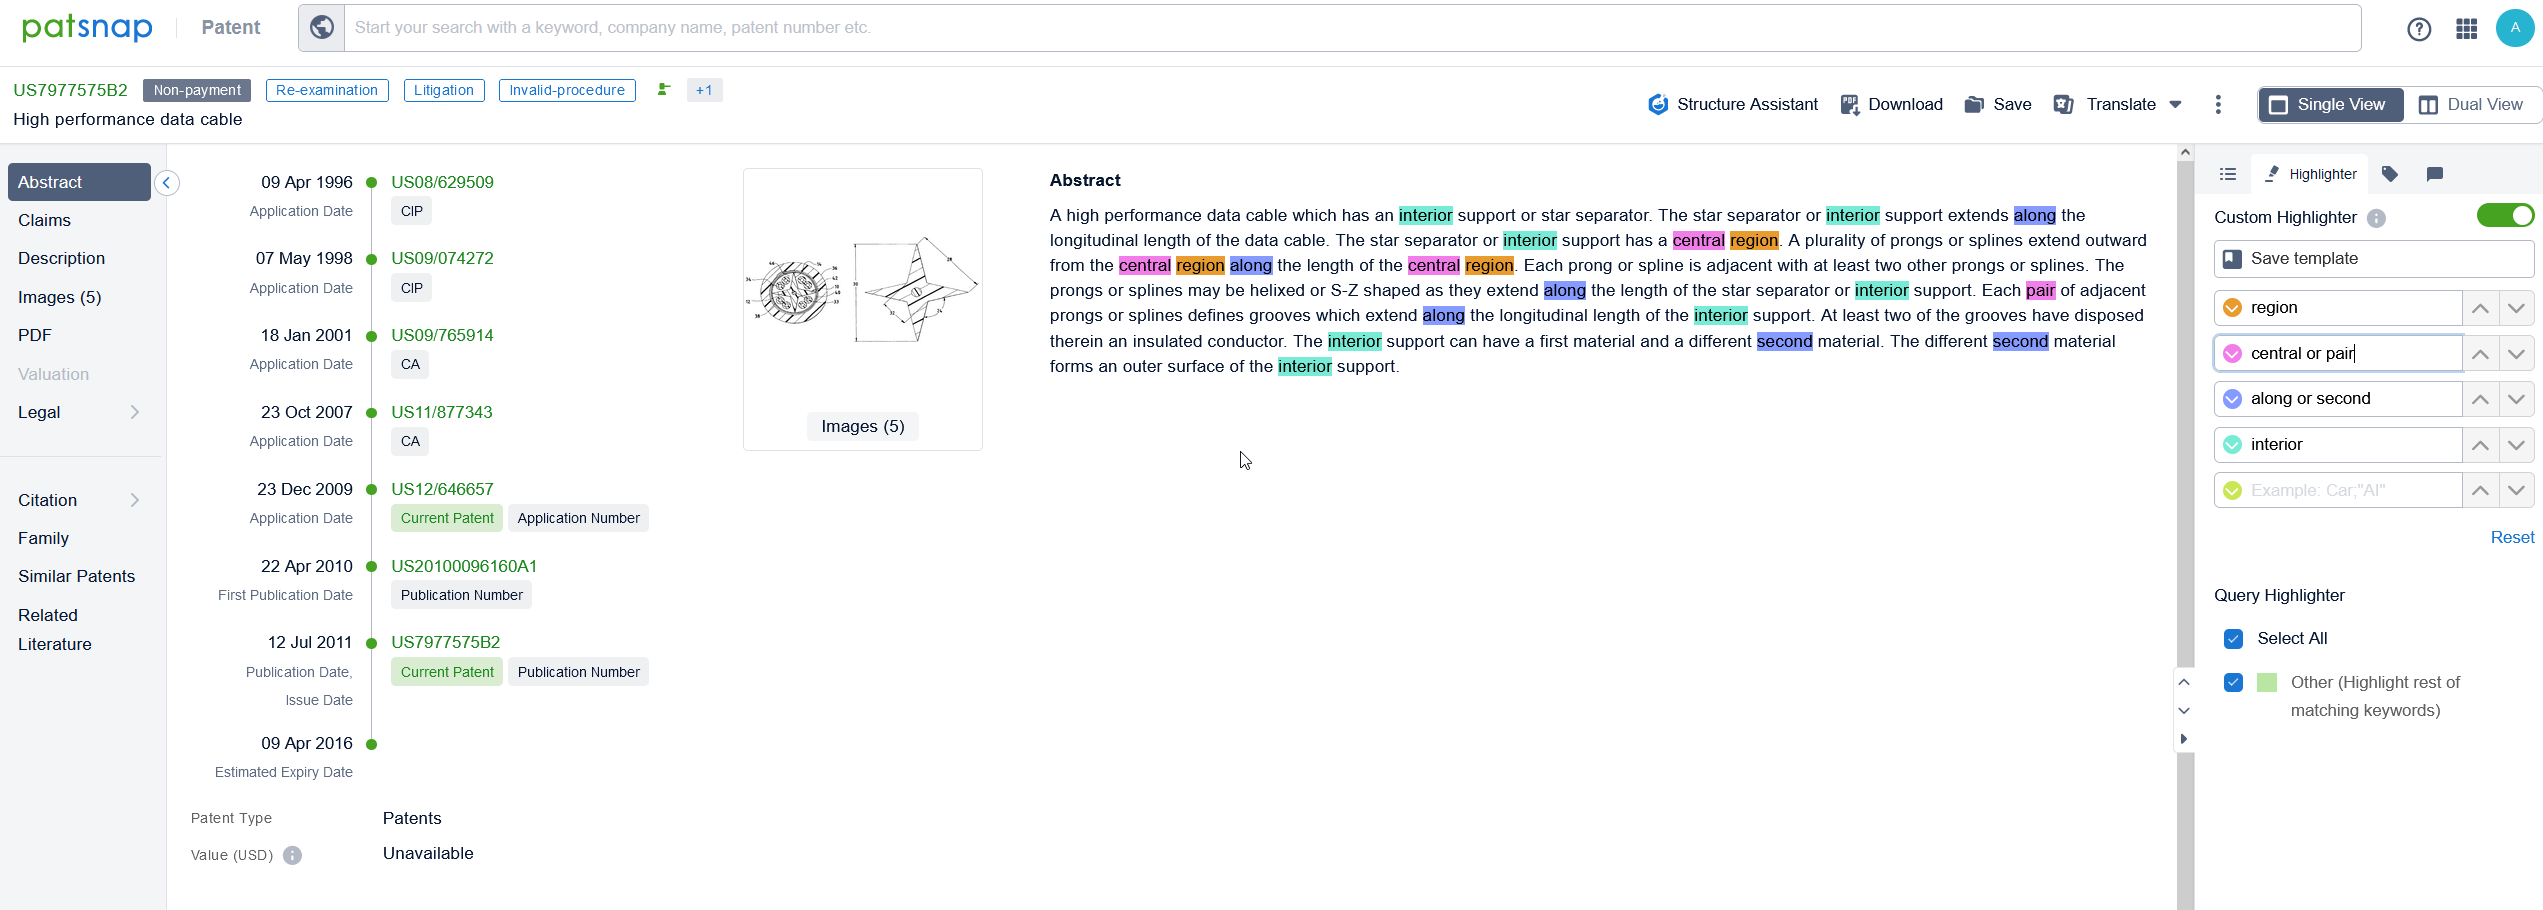
It is worth noting that the highlighter tool does not work in the exact same way as our search engine does, since the highlighter tool will highlight the term you inputted even if it is in the middle of a word whereas the search engine will only consider complete words.
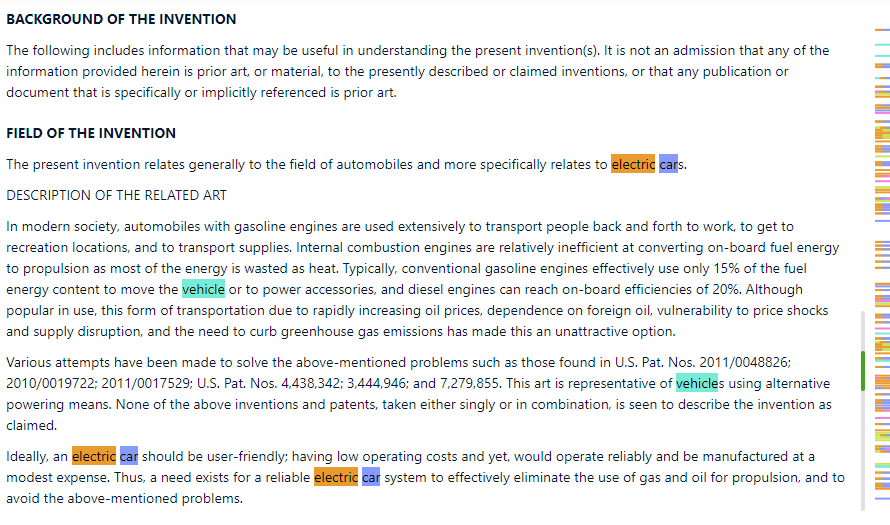
Once you have done this, you will see that the words you have chosen to be highlighted will be highlighted in the full text of the patent, as seen below:
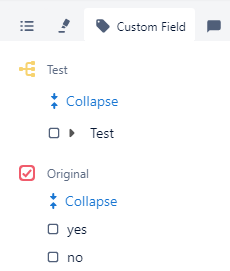
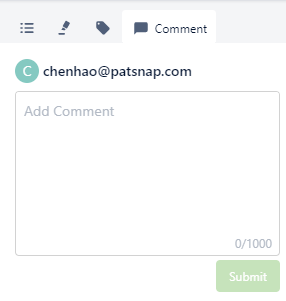
You also have the option to add "Custom Fields" and "Comments" here.
You also have the option for reporting data errors. When reporting a data error, you are able to select from the options of data missing/incomplete, data error, data improvement, or others and then type in the issue below this.

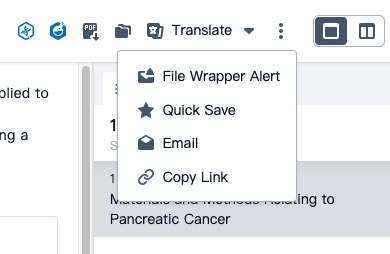
There are also multiple options in the top-right corner of the screen. These are shown below:
The first and second options are the "Sequence Assistant" and "Structure Highlighter" respectively (these options are only available if you have the Bio and Chemical platforms respectively, if you don't have them yet and are interested in getting them, please discuss this with your account manager). You can find out more about these options in the following articles: How Does The Sequence Highlighter Work? and How To Extract Chemicals From A Patent Onto PatSnap Chemical
The third option is "PDF Download", which allows you to download the patent as a PDF file.
The fourth is "Save To Workspace", which allows you to save the patent in a specific folder in a Workspace.
Next is "Translate", which allows you to view a translation for this patent's full text. You can find out more about this option here: Searching for Patent Translations in PatSnap
Next is "File Wrapper Alert", which allows you to be made aware of any updates to the file wrapper for certain patents. You can find more details about how to do this in the following article: How Can I Setup Alerts For File Wrappers?
Next is "Quick Save", which is a shortcut for adding a patent to a Quick Save Workspace folder.
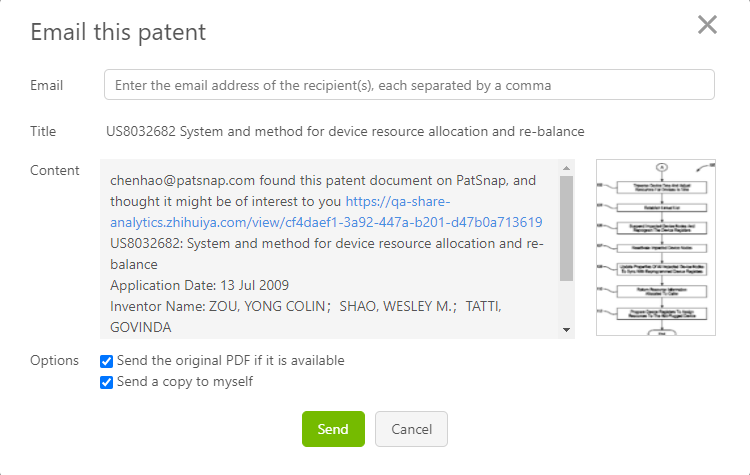
The next option allows you to share information regarding this patent to other people as an email or a link. In case of an email, you have the option of introducing the patent titles and abstracts in the email, sending the original PDF file (if it is available) within the email as well as sending a copy of the email to yourself.
You can also copy a link of the current patent to your clipboard which you can then paste wherever you want.
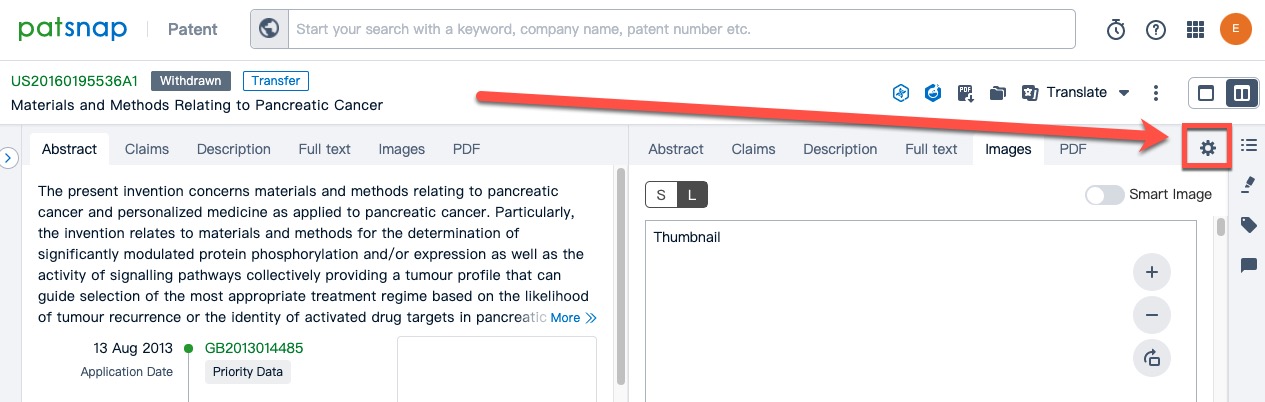
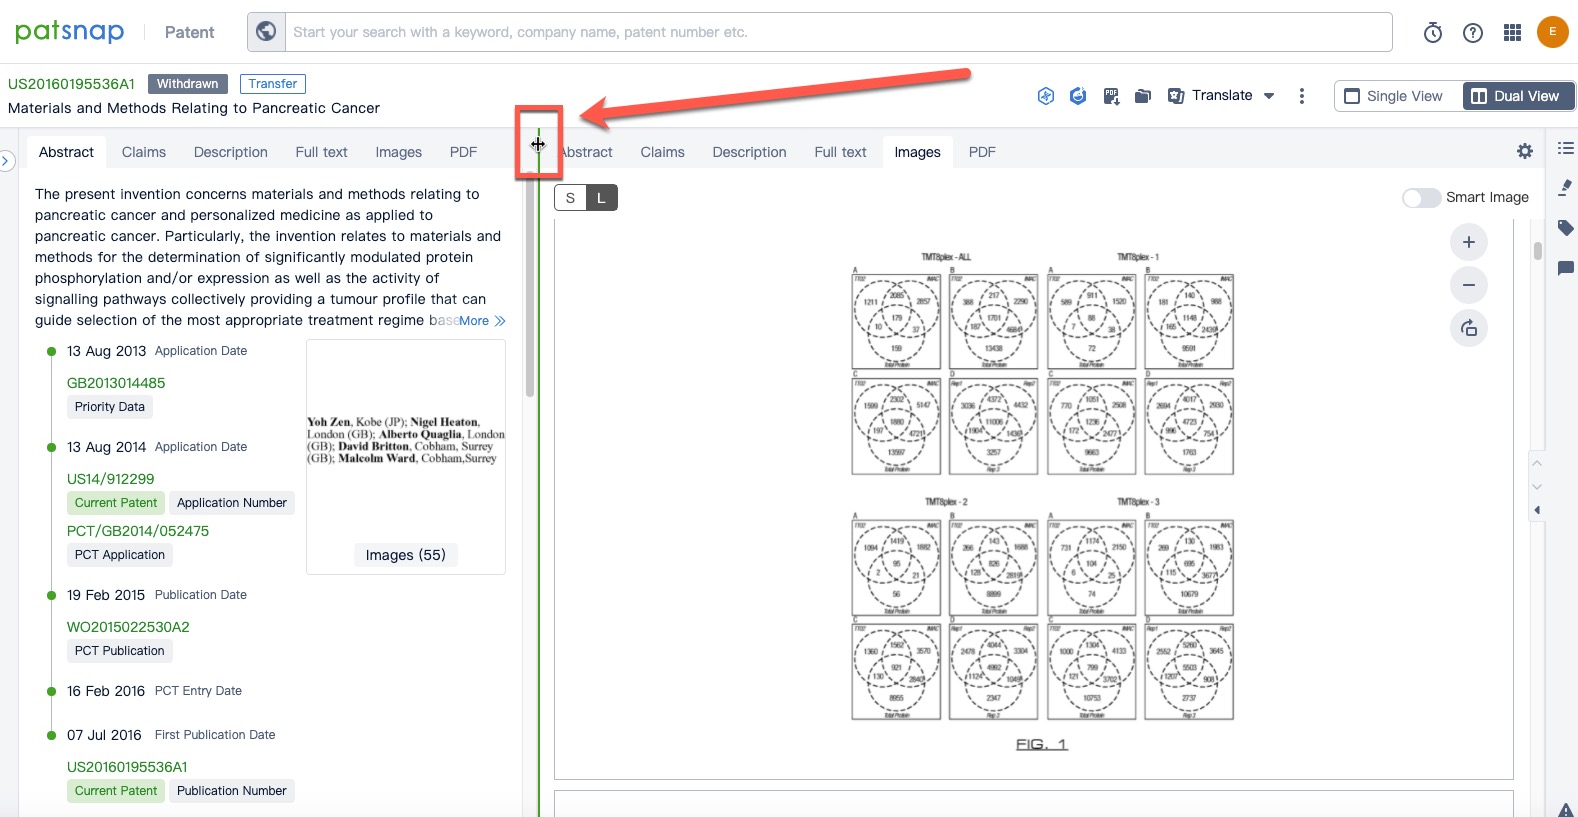
Finally, you can switch between the "Single View" option which we have been referencing so far in this article, and "Dual View".
When you use this view, you are able to compare either the abstract, claims, description, full text, images, PDF, transaction, citation, family or similar patents of a patent side-by-side with each other.
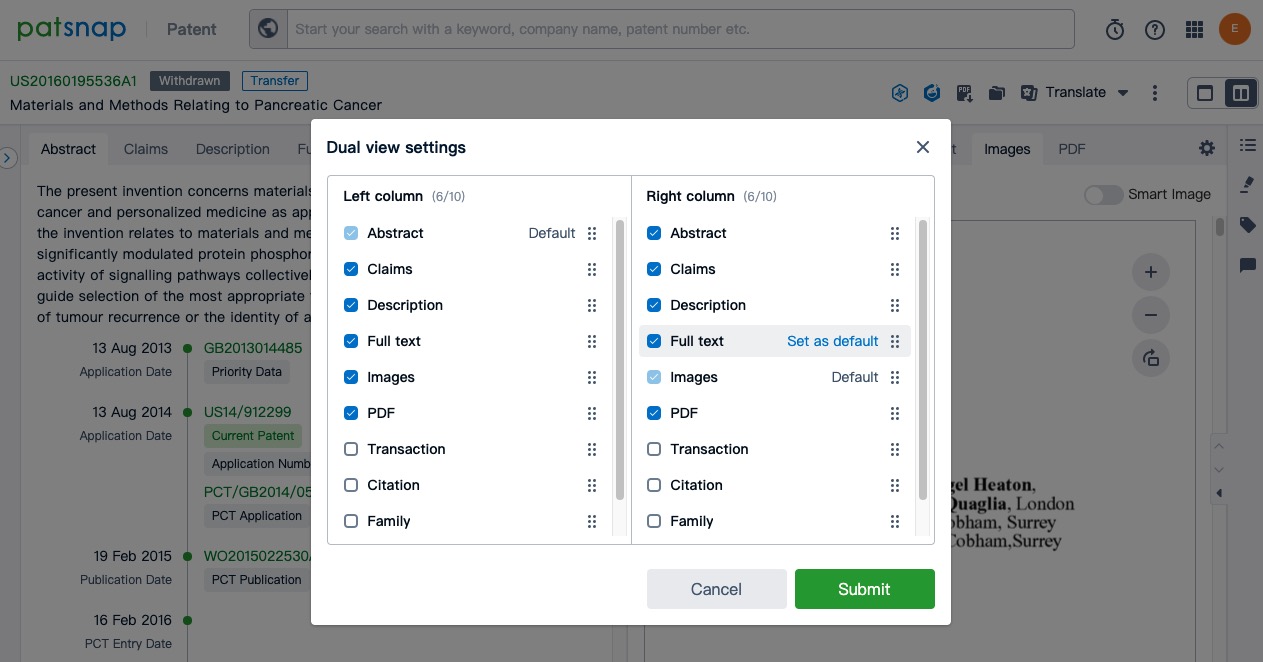
You can edit your dual view by using the cog icon located on the top right side of your screen.
This will then give you a selection of different arrangement based on your own preferences. Hit submit once you are happy with your choice.
Once you are happy with your view, you can then continue to alter the size of the dual view by moving the middle divider.
Comments
0 comments
Please sign in to leave a comment.